13 Super WordPress Security Strategies
Web Security as a Whole
Security is one of those boring topics. One of those things nobody really wants to hear about, until something dramatic happens. It’s on our minds, but not on the front of our minds. It is an afterthought if anything. However, web-security is more than an afterthought before, during and after a website build. Security is the foundation for a healthy website and allows you to be worry free about potential vulnerabilities. Let’s face it, any content management system (CMS) that you or your company implement, be it proprietary or open source, will have some security vulnerabilities. This goes for WordPress as well. That’s why we have updates to software. Updates are essentially security and usability patches that help (hopefully) improve the CMS as a whole.
What are some effects of poorly managed web and IT securities?
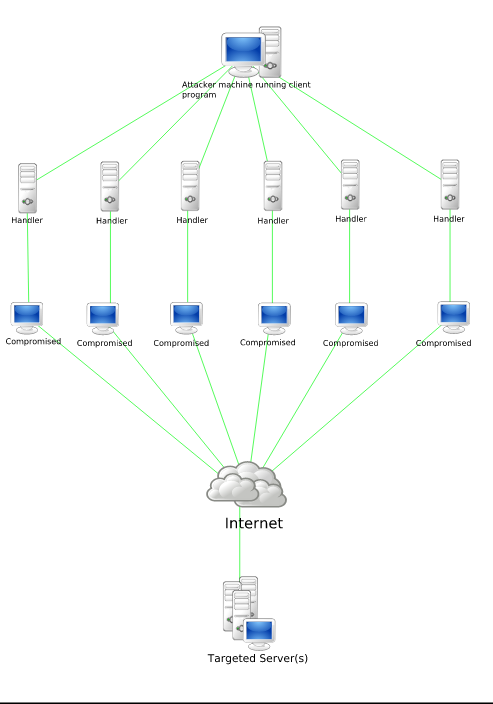
- DDoS Attacks
- Brute force attacks
- Data Loss
- Data Leakage
- Stolen Data
- Server overage charges
- Hardware malfunction
- Software malfunction
- Destruction of Property
- World Hunger
- Loss of Money
That’s right, the bottom line for all these security flaws is that it will COST YOUR MONEY. However, it does not cause world hunger, but this still should be in the back of your mind because somewhere someone is starving because of your IT negligence. By ignoring security vulnerabilities, you are exposing yourself and your company to potential attackers that can decimate your online business. Heck, they can take the entire company down and shut you off for months. Just search website hack in Google News and you’ll find hundreds of articles talking about companies and sites getting hacked.
Don’t think it’s a serious matter? That’s fine, I’m not trying to convince you. You’re probably the same person who can waddle through life without having any identity theft protection saying “oh it won’t happen to me”. Meanwhile your credit information is being used to apply for a business loan by a would-be thief. Security is not just an essential consideration, it’s the lifeblood of a successful company.
 Now, many companies now have turned their heads to a platform called WordPress. It’s a great open-source CMS that has unlimited versatility and flexibility. With that said, it’s open-source. This means that the source code for all the files are available to everybody, not just you and I. This includes hackers. Since hackers and the lay-person have the same opportunity to know and use the source code, this leaves WordPress very vulnerable. Each and every day, hackers are attempting to find loopholes and security vulnerabilities in the system. When one is found, it has to be patched with an update. This is an ongoing battle.
Fortunately for you, WordPress is constantly updated and has a huge community of support. This means that for every breach, there is someone looking for a solution. However, despite the WordPress security vulnerabilities, there is quite a lot you can do to protect your site and your business from would-be hackers. You must remain vigilant and learn to embrace the potential hack attempts.
There are tons of measures you can take to protect your site and notify your developer to take in order to prevent break ins. Let’s go over them.
13 Super WordPress Security Strategies
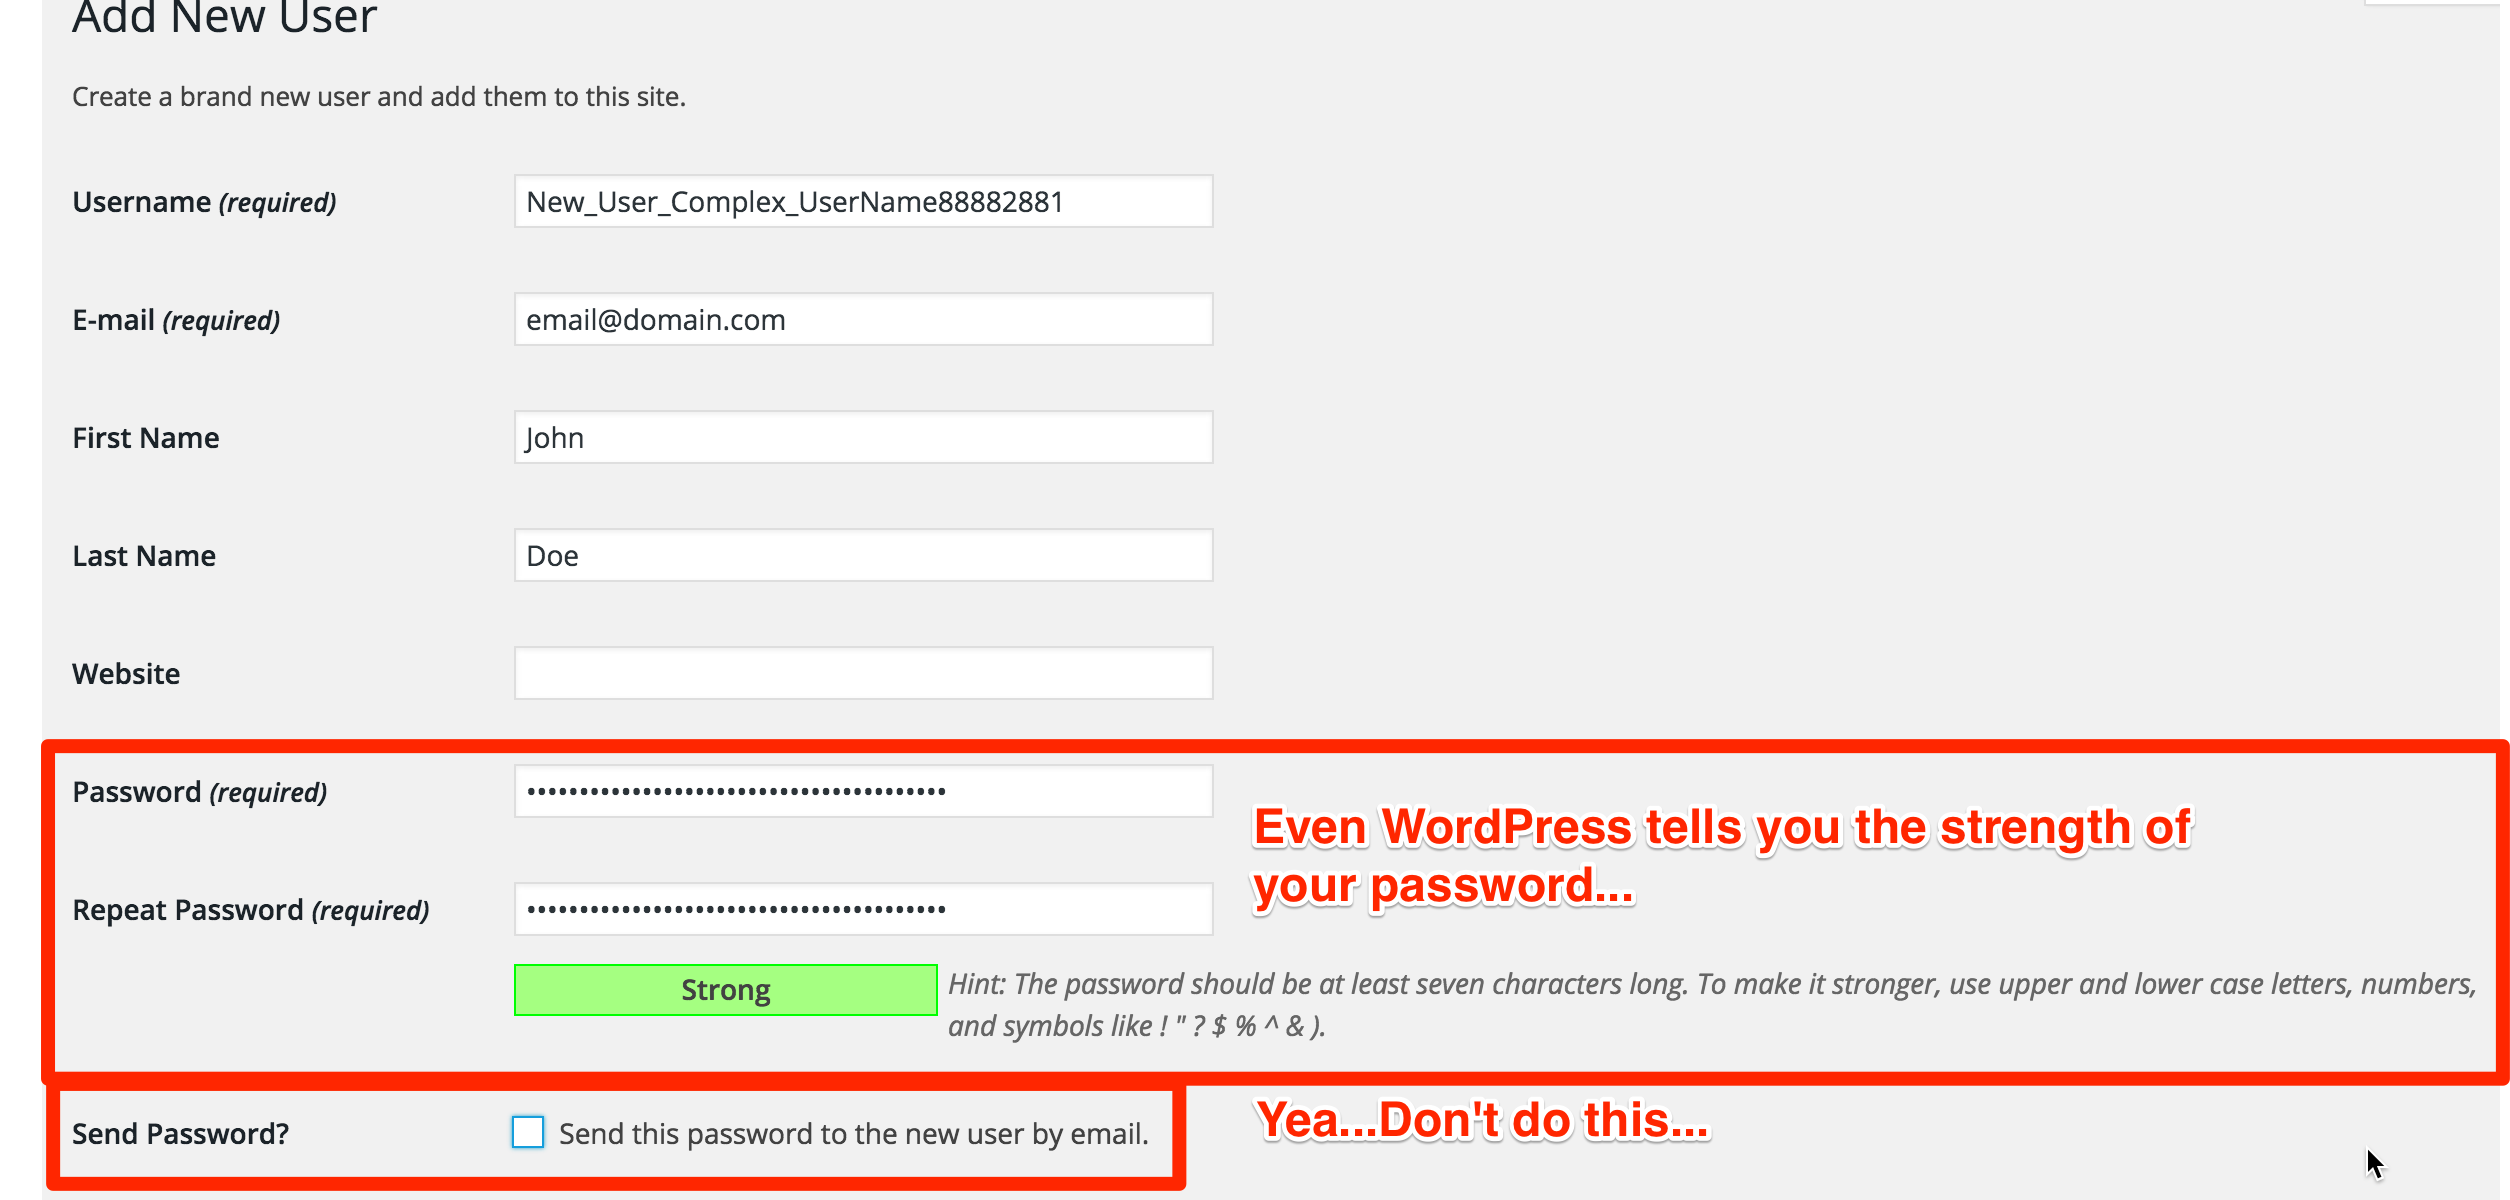
1. Use Strong Passwords for all users.
What’s a strong password you ask? Well, it’s a password that contains an uppercase letter, a lowercase letter, a number, and a symbol in varying combinations, typically with a minimum length of 6 characters. Passwords is an obvious one, but I still see many web admins with very weak passwords. I have conveniently placed a password generator on the right hand side of this page that you can use to generate unique, complex passwords at any length you choose. Give it a go!
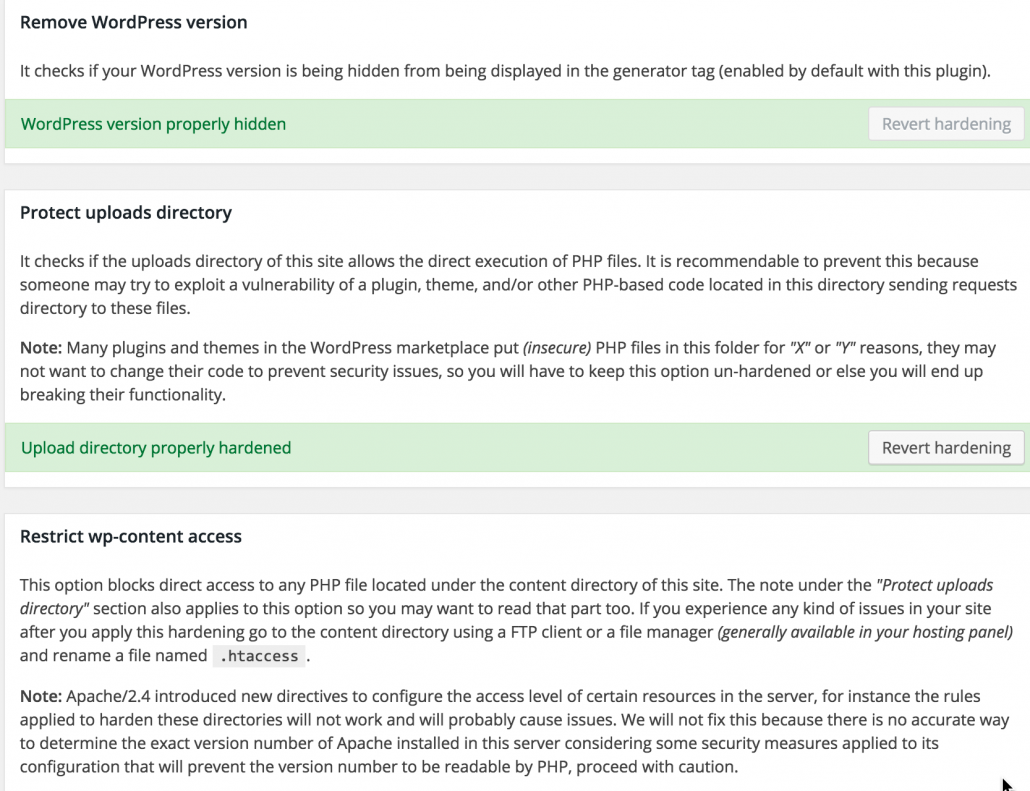
2. Hide your WordPress version.
This is something the Sucuri plugin can help you with. I went over how to do this in a previous post.
 3. NEVER EVER name your user as “admin”.
This is especially the case when the user ID 1 (first user registered) is also named admin. Hello? This is the most obvious security vulnerability out there. I still see developers and amateur web-admins use admin for their username and their password that is something weak. This is a very quick way to get yourself in trouble and hacked. Ask yourself, if you were a hacker, what would be the first username you would try to use? Could it be admin? hmmmm. Let’s just ponder that one for a bit.
What do you do? Create your first username as a throwaway when developing your new site. This throwaway username has the ID 1 (first user created) and should be deprecated immediately. Then, followup by creating a new user, the true user you’ll be using, after that.
4. Change your WP Prefix.
C’mon now. This is getting easy. When you developed your site, did you set your wp-config file to have different prefix? Probably not. What’s a prefix anyway? Well, standard WordPress prefixes start with “wp_”. This is the prefix for the database, so anything database related will start with wp_[something]. This is a clear indication that you haven’t hardened your site. So how do you change your prefix on an existing site? One of my favorite and simplest ways to do this is to use a tool called Backupbuddy. All you have to do is create a database backup of your site and then reupload that database onto the same exact database and server. It will override the old site, but not any of the content, comments or settings. The important stuff will still be there, but it will just have a different database table.
5. With that said, regular backups are a must.
Backup the heck out of your site with a minimum schedule of once a week. Too lazy to do that? Fine, we have a Premium WordPress Support that will do that for you. Oh and we’ll also set up the security so you don’t have to. The tool I like to use has already been mentioned above.
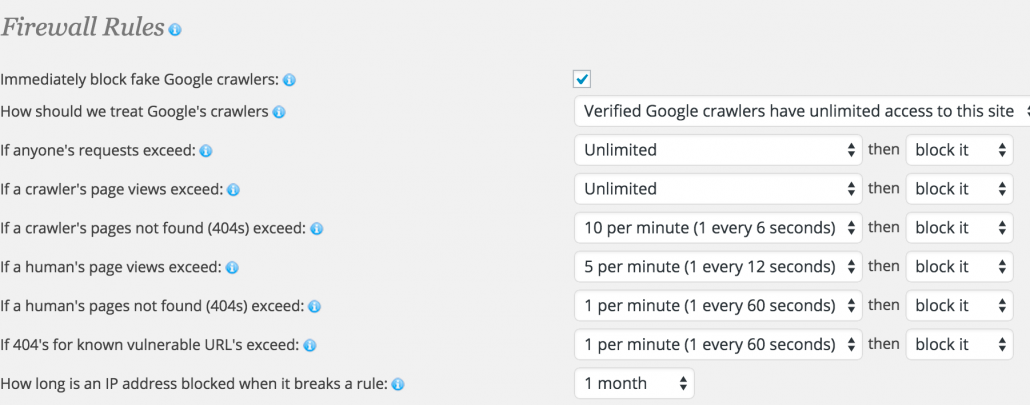
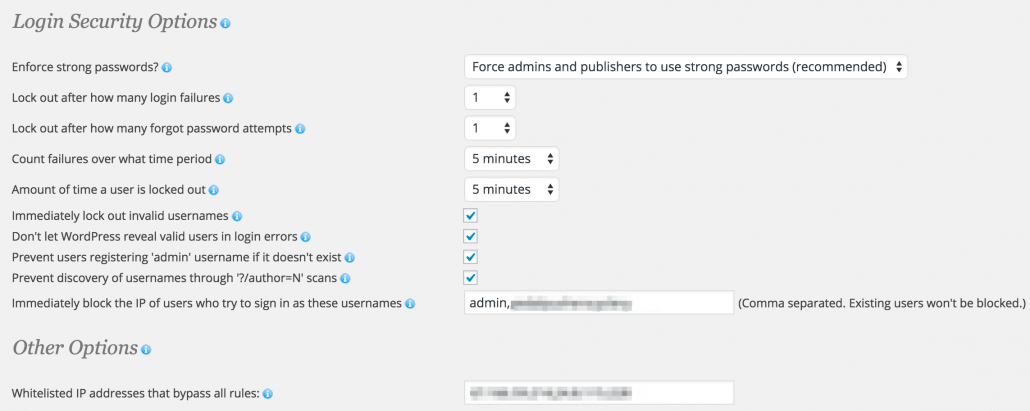
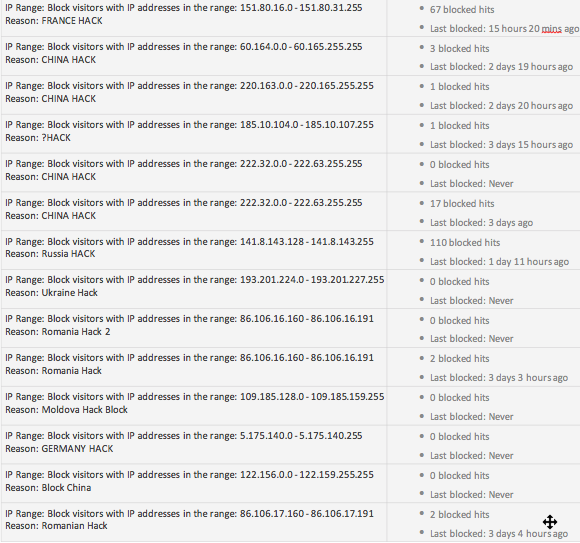
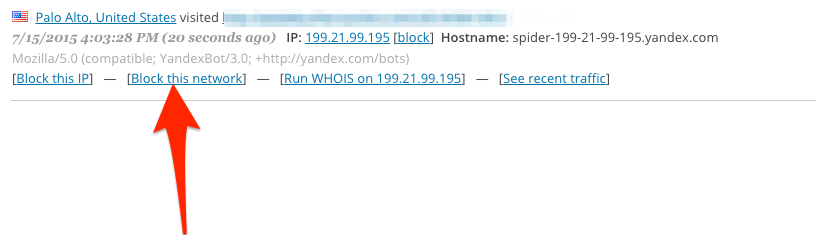
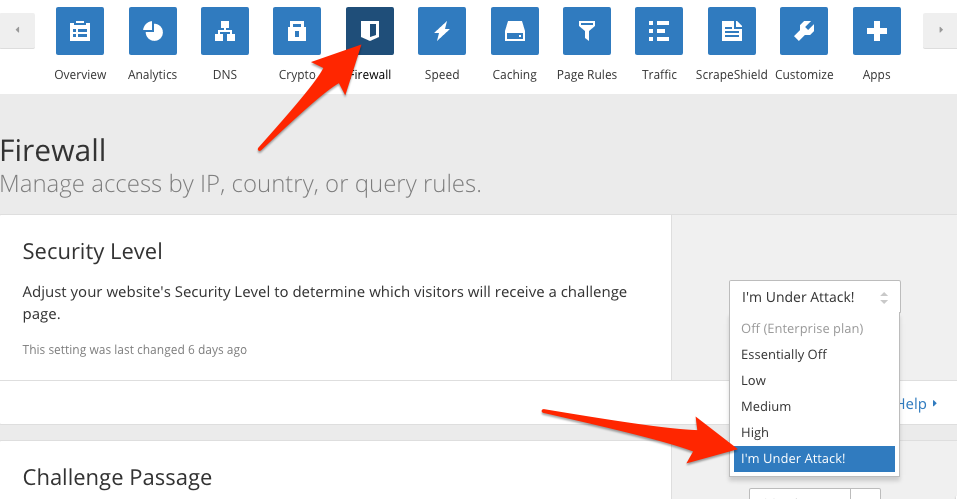
6. Set up Wordfence and establish minimum security protocols.
Again, this was gone over in one of the previous posts about DDoS attacks. This is an essential plugin that has the ability to block IPs to the admin pane. It’s essential that you set up some way of blocking would-be hackers’ IP address. You can block an entire pool of IP addresses at that rate. The way I set mine up is to block any incorrect usernames immediately. After you whitelist your own IP, you can bypass all the rules, but anybody who tries to login with an incorrect username get blocked immediately. This includes you, if you are accessing the site from a remote location that is not your home-base. So be careful with this one.
7. Backup and secure your .htaccess file.
This is the file located in your ROOT directory and contains the necessary information about who gets to log in and who does not. Who gets blocked and who does not. Which types of accesses are allowed, and which ones aren’t.
8. Update your WordPress instance regularly.
Along with all your plugins. I already explained why this important and frankly, just do it. Be vigilant and don’t let your site get outdated.
 9. Minimize the usage of plugins, and always ensure they have the proper reviews and community.
Imagine each plugin as an additional security vulnearbility. Each plugin has its own code and its own potential to be vulnerable to attacks. Minimizing plugin usage will help you contain most of your instance in just a few plugins. No need for any complexities and more vulnerabilities. Minimizing plugin usage and using only good plugins from reputable authors, like those on the Envato Marketplace, are usually a good choice. I’m always weary of plugins found randomly on the web, that aren’t listed in the official WordPress plugin repository.
 10. Avoid blackhat plugins or themes
I mean, completely. Those found on blackhat sites are no good. Just avoid them at all costs. Nobody has time to go through each and every PHP file, so there is a high chance that if someone is offering a paid plugin for free, that it may be infected with some sort of malicious software. Who knows what it could be, but if you are “hacking” a plugin or theme, or got one for free, just avoid it. Don’t even let it touch your server. Never even attempt to install it because it can ping the author of the malicious file that you have activated their virus. This could line you up for a brute force or DDoS attack after you are on the radar. Just avoid any 3rd party plugins or themes not found on the official WordPress plugin repository, or other reputable vendors. Generally, if you gotta pay for it, it’s worth it.
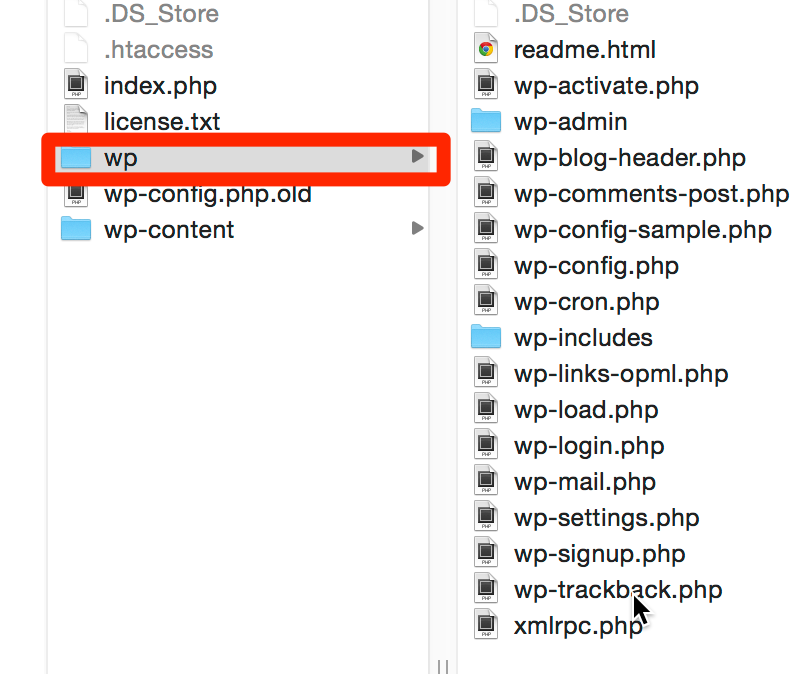 11. Change the installed location of your WordPress instance.
Everybody who knows anything about WordPress knows the file structure. Sometimes people fail to remove the “/wordpress” folder in their instance. C’mon now. I said be vigilant, not lazy. In either case, at the very least remove the “/wordpress” directory and add it to your root directory. An even better, albeit, more complex approach to this would be to change the path of your WordPress install entirely. Something like “wp/wp-admin” The rest of the less important files can be nested in the root directory. Just something different than the normal install path would do. This is a bit more complex to handle and can be handled by the right wp-config file.
12. Use a child theme for all themes.
Using a child theme prevents most users from knowing what theme you are using, hence limiting the amount of research they can do to attack you. The less they know about your site, the better.
13. Don’t share your login information with anybody, but trusted sources like your developer.
Don’t email passwords, or share them via text. Try to avoid sharing the passwords entirely. Create new users instead. Avoid emailing the new user information to anybody. Simply put, don’t share your passwords with anybody. If you do have to share, which you shouldn’t, but if you do have to share your passwords, make sure you change them once you’re done doing whatever you’re doing.
Security is a constant battle of good vs. evil. It’s the most raw examples of hackers and security experts playing a game of chess on the web. Of course, besides actually playing chess. They are always trying to outsmart each other, and a lot of the time the hackers do win. In fact, most of the time they win. However, if you do the above mentioned steps for your own protection, you’ll ward off most, if not all attackers. The reason is, if you have hardened your site, and made it very apparent that your site is locked down like a fortress compared to your neighbors, the hacker will most likely move on to an easier target.
